A wall-hung toilet, like his brother's compact, can also break or begin to leak. Such a situation is not at all a sign of future expensive repairs with the collapse of the walls in the bathroom - repairing the installation for the toilet can cost a little blood. And you can always try to eliminate the problem with your own hands.
We suggest that you familiarize yourself with the methods available to independent craftsmen for troubleshooting a wall hung toilet. We list the main causes of breakdowns and “symptoms” that indicate their occurrence. Attention is paid to both the plumbing itself installed on the support frame and the fittings of the flushing cistern.
The diagnostics described in detail and the carefully described methods for restoring the performance of plumbing devices were supplemented with visual illustrations and video guides.
List of traditional breakdowns
Damage to the toilet can unbalance even the most calm and good-natured person. This is not a tap, without which you can do a couple of days using a shower head. It will not be possible to live comfortably without a toilet, so the issue of repair should be addressed promptly.
It’s not worth thinking that an expensive hanging toilet with installation can last for ages without any problems. Each toilet, like any other product, has its own life. In some systems, it can reach 10-12 years or more.
The life of your plumbing fixtures can be found in the manufacturer's instructions in the warranty section. If you carefully study this document, you can see that some components have a shorter service life.
Image Gallery
Photo from
Disguise installation in the interior
Double-button installation
Installation hidden by a false wall
Sanitary advantages of the toilet with installation
So, the filter and gaskets must be replaced much earlier.

It is advisable to always have a set of spare parts for valve repair on hand. If necessary, it will help speed up the replacement of broken parts.
Built-in plumbing with an installation system consists of the following parts:
- frame or frame;
- cistern;
- nodes for the supply and removal of working fluid;
- toilet / bidet / urinal.
Damage is possible in every part of the installation. To eliminate the cause of the malfunction, you must first find it. This task seems impossible without a large-scale repair. But it seems only at first glance.

Looking at the wall-hung toilet creates a feeling of lightness. It’s not immediately clear how he hangs on the wall and why he doesn’t fall - no one suspects a rough metal frame
The frame or supporting frame is made of durable metals on the right, and is coated with an anti-corrosion layer on top. This part is durable - I will attach all the other elements of the system to it. It is able to withstand up to 600-800 kg of load.
This characteristic will differ for each manufacturer. It is important to pay attention to the maximum allowable load of the model you like before buying. Sometimes, in order to save money, they buy a cheap fake, where this figure is only 100 kg.

You can not save by buying a cheap frame. A good installation is made of a high-quality alloy, which is not afraid of stress or corrosion. This is the key to a long service life.
Such a frame can easily bend or crack from overloading - about 70-80 kg adult weight + water tank + weight of the toilet itself. And if a large relative weighing more than 100 kg visits a bathroom, then it’s scary to imagine what will happen. Therefore, do not buy fakes - this is an impermissible luxury.

If the integrity of the tank was broken during installation, it must be replaced. It is not correct to fill the damage with sealant, hoping that it will last a long time
All manufacturers make a drain tank of plastic. It is flat or trihedral, and inside it there is plumbing fixtures to ensure automatic filling and flushing.
What can happen to the tank:
- The plastic container may break in case of installation errors. If it was an independent installation and, due to inexperience, the installer made mistakes, the tank may warp and crack over time.
- If a krivoruky master was involved in the installation and accidentally hit it during installation, then after a short time a leak may occur at the cleavage site and it will be necessary to replace it with a new tank.
- The fittings installed inside the tank consist of plastic parts, rubber and silicone gaskets. Often problems arise due to the wear of one of the components.
Leads for supply and return can leak. The coarse filter installed before water enters the drain tank clogs over time. And at the joints of all the pipes, leakage may occur - elastic rubber gaskets fail over time, turning into hard plastic parts.

If this happens and the rubber gaskets are not elastic, then they must be replaced using a spare from the repair kit or buying a suitable diameter
With the toilet, problems can also arise - from a usual chip, to a violation of the system for draining the working fluid into the sewer riser.
Do-it-yourself troubleshooting
To find the source of the problem through the fault of the toilet, you can resort to a plumber, call a neighbor who helps everyone and takes inexpensively, or try to do it yourself.
The first option is safe, but requires an agreement on the time of work and will cost a decent amount of money. Of course, this is the most convenient and easiest option - you do not need to do anything, twist, change - gave money and accepted the job.
The option with a neighbor / acquaintances of acquaintances is like a cat in a poke. Doubtful quality of work can lead to even bigger problems and more serious breakdowns.

To detect the problem and fix the breakdown, you need to disassemble the installation system, reaching its insides through the revision window
The third option involves an independent study of the installation system installed in your bathroom and its repair. This is a simple activity that does not take haste. It is important to take the manufacturer's instructions and carefully read the relevant section. If the instructions are lost, you can search the sites of online stores or ask a plumbing store consultant.
All controversial issues that arise during the installation repair process can be viewed in thematic video clips. Armature models of integrated tanks of different manufacturers may differ from each other.

If it was possible to disassemble the tank fittings according to the instructions, then you need to replace the broken parts using spare parts from the repair kit
It is enough to disassemble the drain tank fittings, rinse components, replace worn parts, reassemble everything, and the system works as a debugged mechanism - without failures.
Installation repair methods
Together with the purchase of a toilet installation, it is advisable to immediately buy a spare repair kit. It may be needed after 10-12 years or 3-4 years after the start of the system. In order not to run and not to search for spare parts, you should always have them in the pantry / on the shelf with tools.
Finding a problem inside the drain tank
The volume of repair work will depend on what exactly broke. The most common problems encountered through the fault of fittings:
- Water continues to run after flushing is complete. The reason may be the accidental ingress of foreign objects into the drain tank - hair, cardboard, pieces of construction debris and other inclusions. The solution to the problem is to get bulk and drain mechanisms and eliminate the problem;
- Slowly water comes out of the tank after pressing the flush button. Damage to the harmonica of lifting the drain mechanism is possible. The way out is to replace the drain mechanism;
- Water does not accumulate in the tank - there may be problems with the float. It may come off the mount. The solution is to disassemble the system and replace the float;
- The valve does not completely block the water - change the membrane or replace the gasket.
It turns out that in most cases you need to look inside the drain tank without getting it out of the wall. This can be done by a home craftsman, with the instruction of dismantling the fittings.

Access to the installation is provided through the audit window. No need to break the wall to change the gasket
Flush Button Recovery
The flush button is mounted on a special frame and connected to the system using levers and cables. They are pneumatic and mechanical. It is important that the devices are reliable and of high quality for long life.
On sale you can see various models of buttons - with backlight, with two and with one key. They differ in size, color, shape and material of which they are made. But some options can be universal - approach installations of various manufacturers.

Buttons for flushing, due to their universal characteristics, can be selected based on the general design of the bathroom, taking into account the shape, material, the most suitable color
If the flush button does not work well, then you need to remove it and look in the audit window of the installation. It is possible that the air hose leading to the installation through the pneumatic button is loose. Or the button itself broke.
The solution to the problem depends on the situation - adjusting the hose or buying a new button. Often, in the instructions for a particular model, the manufacturer not only describes the installation process, but also indicates which buttons are suitable.

The flush button for installation is sold together with a decorative panel that successfully conceals the inspection window. In the event of a breakdown, it is easily removed to gain access to the internal installation mechanism.
Breakdown Detection Methods
When you have to find a breakdown inside the installation, it is not necessary to break the wall. You can get the drain tank mechanism through the inspection window. Let’s take a closer look at how to do this using the Geberit installation example.
First you need to remove the decorative trim with the flush button by pressing down and pulling it towards you. Then you have to remove the frame on which the key is attached.
To do this, unscrew the screws, pull out the plastic pushers. Then, in a way that depends on the model and manufacturer of the plumbing, you will have to remove the partition by pressing on its latches. On this partition, a dismantling scheme for the drain tank fittings can be applied, which is used to clean the valves and check the gaskets-seals.
An important step is to shut off the water flowing into the drain tank. Otherwise, it is possible by its actions to arrange a real disaster of a local scale - to flood not only your bathroom, but also the neighbors below.
Image Gallery
Photo from
Step 1: Removing the frame with the flush button
Step 2: Removing the Septum on the Tank
Step 3: Dismantling the Rocker Arm
Step 4: Replacing the filling valve
Next, the bulk valve should be dismantled - you must first remove the rocker arm, and when reassembling, you will have to fall into the gearing of the flush valve and 2 fixation points with two rockers.
Then it was the turn of the filling valve itself, to which a flexible water supply pipe was supplied. He is carefully taken out. This valve controls the level of water filling in the tank - if you twist the plastic pin, you can raise higher or lower the float, which ensures filling the tank in the specified volume.

The plastic pin responsible for adjusting the level of the float rotates easily. It can be twisted with your fingers, without the use of keys and other special devices
Now, next in turn is the removal of the drain valve retainer - for this, the wings are spread in opposite directions, which removes the part from the cordon.
It is necessary to dismantle a rather long flush valve - you can not do without partial dismantling inside the tank. To do this, holding the inside, you need to unscrew the upper part and lower the second link to the side.
All - the valve is easily removed from the interior of the drain tank built into the wall. It consists of two blocks - the upper one for small and the lower one for large discharge. There is a basket on the bottom of the valve, which, if it is necessary to replace the gasket, is easy to remove.

All fastenings of reinforcement parts to each other are very simple, they are folded and disassembled as a designer. The main thing is to do everything calmly and not to rush, so as not to accidentally break something
Now all the details need to be carefully inspected, washed under running water, to assess their condition for deterioration. Replace broken parts, gaskets. After eliminating the breakdowns or scheduled cleaning of all parts of the valve, it is necessary to assemble all components in the exact reverse order.
If the condition of the mechanism is extremely poor, then you need to replace the whole mechanism with a new one, using new fittings for the drain tank.
It smells bad in the bathroom
Often you may encounter a situation where everything is in order with the bathroom ventilation system, but under the hanging toilet it flows and there is a disgusting smell of sewage in the room, and water may leak behind the tile inside the structure.
Here, the problem may be related to violations of the rules for installing a hanging toilet and to the nodes connecting the tank to the toilet and the toilet to the sewer.

The problem with an unpleasant odor arises from the use of shorter nozzles than is required to achieve a normal tight state
The fact is that the basis of these troubles can be in errors made even during installation. It is important that the piping is correctly installed before installing the installation. Here, the length of the supply pipe and the left sewer inlet matters.
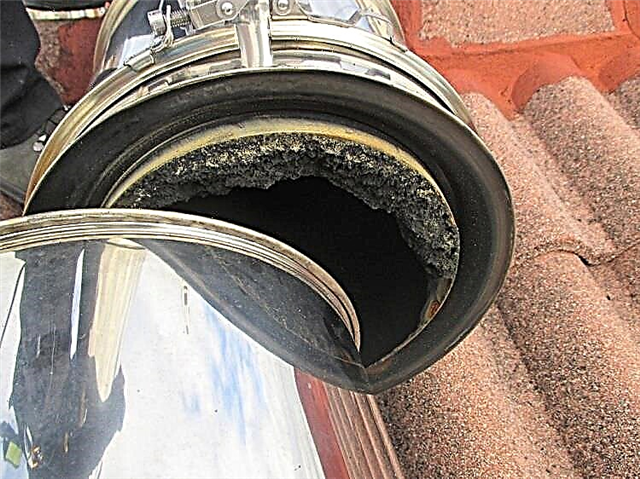
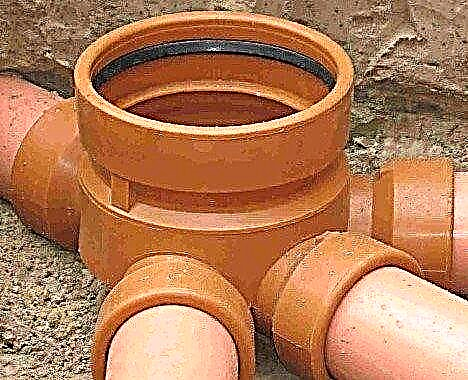
In some installation models, the nozzles are short. This must be taken into account so that later one does not have to invent dubious schemes for sealing. Branch pipes from installation are most often with a diameter of 90 mm. They are placed through the adapter in the sewer, which is usually 110 mm.

Leakage should be eliminated without the use of corrugated pipes and mounting foam. It is important to choose the right fitting pipe for connecting the installation to the water supply system in the toilet bowl and connecting to the sewer
When the adapter for the toilet or installation pipe connecting the system to the sewer is short, it will be correct to buy a pipe from another manufacturer, a longer one. It will be excellent and everything will be airtight.
On the adapter, you should not save - everything should be tight here, there should be leaks. Some of this length is enough, while others, for the latest models, for example, Grohe, have short pipes.
Clip # 1. To disassemble the installation without destroying the wall of the bathroom is real. How to do it yourself:
Clip # 2. The appearance of an unpleasant odor may be the result of an error when connecting the toilet through the installation pipe to the sewer. You can fix this problem:
Clip # 3. When water began to appear under the hanging toilet, you need to find the failure of the installation:
Any breakdowns in the installation of the toilet can be repaired by yourself. This is more effective than inviting craftsmen with crooked hands, and cheaper than the services of a professional plumber.And familiarity with the installation system may come in handy in the future, when there is a need for an operational repair.
You can talk about how you personally repaired the supporting frame of the hanging toilet and share useful information in the block below. Please comment and ask questions.