When any mechanisms are used, technical oils are used. When used for their intended purpose, they are not burned and retain flammability. Instead of recycling, an alternative option to reuse them is a waste oil stove, which you can make yourself.
Let's try to figure out how a potbelly stove works and what materials will be required for its manufacture. We will also talk about popular models of homemade stoves and share the secrets of their successful operation.
The principle of operation of the potbelly stove
The work of a potbelly stove is based on the phenomenon of pyrolysis. In such a furnace, where the oil is used as fuel, there are 2 main compartments: a tank and a combustion chamber located at different levels. The first is designed to fill the mining and its combustion.
In the other compartment located above, the combustion products of the mining mixed with air are burned. In the first stage, the temperature is relatively moderate, and in the second it is much higher - up to 800⁰.
In the manufacture of such a furnace, the main task is to make sure that air enters both compartments. It enters the first chamber through an opening intended for loading liquid fuel. The hole is equipped with a special shutter, through which the volume of air is regulated.

Despite the fact that the design of the furnace is very simple, increased demands are placed on the chimney stove. For effective removal of combustion products, it is necessary to prepare a straight pipe with a diameter of more than 10 cm and a length of more than 400 cm. Bends and horizontal sections are extremely undesirable. In addition to its direct use, the pipe also acts as a residual heat exchanger.
Air in the second tank is provided by openings with a diameter of about 9 mm. The efficiency of a correctly assembled potbelly stove reaches 90%. Visually different potbelly stoves can differ from each other both in shape and size, but the principle of operation is the same.
The power of the potbelly stove is proportional to the volume of the lower tank. The more voluminous it is, the less often you will have to add mining. Sometimes this container is made very massive, containing about 30 liters of used oil.
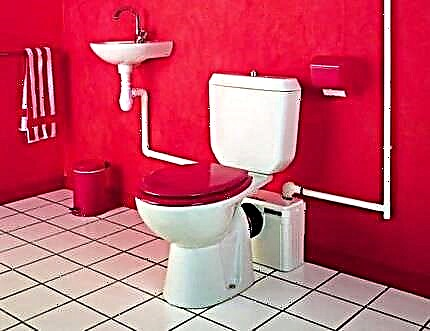
Improvement of the simple design of the stove at workout made it possible to invent a unit for arranging a garage in which it would be nice to wash your hands with hot water, or a small private bathhouse:
Image Gallery
Photo from
Enlarged afterburner
Drawer lower chamber
Convenient scheme for filling mining
Practical hot water tank
Making a simple do-it-yourself stove
The basic design of a self-made potbelly stove consists of 4 parts:
- Fuel tank arbitrary shape with a hole in the center, the diameter of which is equal to the corresponding size of the connected pipe. This is where mining starts. The metal for the manufacture of this structural element must have a thickness of at least 3 mm.
- Combustion chambers or an injector, which is a vertical cylindrical container with a series of holes attached through an opening to the tank. As a result of recharge of air through the perforated walls of the injector, the fuel entering the chamber burns completely.
- Heat exchanger in the form of a tank located above the combustion chamber. The heated gas mixture enters it. The design can have any size and shape. Ideally, this is a tank with a hollow platform where you can heat food.
- Smoke exhaust pipesproviding effective traction.
To make a potbelly stove yourself you need to have good welder skills. Welds must ensure tightness.
Production tank for mining
An alternative to a welded tank can be an unsuitable gas cylinder or a canister with thick walls, but in any case 3 basic requirements are mandatory:
- The design must be at least partially collapsible for the possibility of its periodic cleaning.
- The hole for connecting the injector must be centered.
- The casting hatch should be equipped with an adjusting flap on the bolted joint. With its help regulate the intensity of combustion.
It is easiest to make a tank from pipes of large diameter. A bottom and legs are welded to one piece of pipe with a diameter of about 35 cm. In order to close the tank, take a small piece of pipe of a slightly larger diameter, weld a lid to it, then make 2 holes in it - one control with a diameter of approximately 60 mm, and the other under the injector.

This design of the potbelly stove is very compact. By filling fill the tank (2). In order for the system to work, in the process of burning off, the tongues of flame must reach the injector. As soon as the liquid level drops and the flame no longer enters the injector, the furnace will stop
The height of the side 2 of the part should be 1/3 of the height of the lower tank. The total height of the tank, measured from its bottom to the central hole on the lid - 10 - 15 cm.
Kindle fuel in the tank using paper or cloth dipped in kerosene. They are set on fire and lowered into the container through the control hole. Workout will have to be constantly added to maintain a level of 2/3 of the tank height.
How to make an injector?
The optimal pipe diameter for the manufacture of the injector is 10 cm, the minimum wall thickness is 0.8 cm. To calculate its height, take the length of the chimney pipe, divide it by 10. Five percent is subtracted from the result and the desired value is obtained. It should be between 36 - 38 cm. This is a condition for normal traction.
Holes made in the walls of the pipe in a checkerboard pattern or simply evenly distributed over the surface have a diameter of 0.9 - 0.95 cm. Indentations from the bottom and top of the pipe are 2 - 2.5 cm and 5.5 - 6 cm, respectively.

After all the holes have been drilled, it is necessary to grind the inner surface of the pipe well. Further, the pipe, turned into an injector, is welded onto the hole previously made in the tank strictly vertically
Basic heat exchanger
The minimum wall thickness of the heat transfer capacity is 0.3 cm. It is made using the same technology as the fuel tank. It is better to make the top flat, and the hole for the chimney should be shifted, then it will be possible, if necessary, to put a frying pan or kettle on the stove.
A partition is made inside the hollow vessel, creating a labyrinth for better heat transfer. At the same time, the thicker this part, the hotter the surface of the stove-stove. In order to clean the heat exchanger from soot, make a special hatch on the side and close it with a lid.
On the hole designed for the chimney, a channel is welded - a pipe with a height of 5 to 10 cm and a diameter of 10 cm.
What to make a chimney from?
In order for the combustion products leaving the pipe to have a temperature as low as possible, the part of the pipe that is in the room must be made of steel. Due to this, the smoke gives its temperature to the walls of the chimney, cools, increasing the residual heat transfer.
An ordinary chimney pipe can serve as a continuation of the chimney outside, but it will have to be insulated to prevent the accumulation of soot in the cold period. A thermally insulated pipe is the best option, but more expensive. Joints of pipe sections are not necessary to seal.
Photo-instruction for independent masters
The manufacture of a working stove, which we will consider in the example, was carried out in accordance with the drawing below. Cutting of sheet steel was carried out in advance on a machine with a guillotine. A turner drilled 54 holes in the pipe.

The procurement of parts for the assembly of home-made potbelly stoves for mining were made according to a previously developed scheme. The design was thoroughly thought out and the dimensions calculated
The manufacturing process of the stove itself consists in connecting the workpieces by welding and assembly of the unit, it includes a number of standard steps:
Image Gallery
Photo from
Step 1: Preparation of parts for the manufacture of the stove
Step 2: Designing welds for tank welding
Step 3: Forming Technological Holes
Step 4: Checking the Leakage Tank for Leakage
Step 5: Assembling the upper capacity of the stove at workout
Step 6: Fixing All Top Parts
Step 7: Making a cover for the top of the stove
Step 8: Making a cover for the bottom of the stove
All of these actions were aimed at manufacturing the structural parts of the potbelly stove, which now will simply need to be assembled:
Image Gallery
Photo from
We weld the legs to the lower tank of the stove-potbelly stove in which the used oil is to be poured. For their manufacture, a corner or a profile pipe is suitable
In the pipe that structurally connects the upper and lower parts of the potbelly stove for mining, we drill 54 holes. The pipe is needed to supply air, which ensures the burning process of used oil
We weld a pipe with uniform perforation made in advance to the cover of the lower part of the stove at the end. In our example, drilling was done by a turner
We cut a hole in the lid, which is required to replenish the oil in the "fuel tank" of a homemade potbelly stove
We connect the upper and lower parts of the home-made stove-potbelly stove by welding. We weld a pipe with perforation, leading it into the technological holes
To ensure rigidity and stability of the structure, we connect the lower and upper parts with metal braces made of a corner, reinforcement or profile pipe
We weld a pipe to the hole in the upper part of the stove, to which we will connect the smoke channel
In order to increase the heat capacity and heat transfer of a metal stove, we place bricks on horizontal surfaces. We make sure that they evenly load the structure
Step 9: Welding the legs to the lower tank of the stove
Step 10: Drilling holes in the air supply pipe
Step 11: Welding the Perforated Pipe
Step 12: Cutting the oil fill hole
Step 13: Joining the top and bottom of the potbelly stove
Step 14: Install Stretch Marks For Stiffness
Step 15: Fixing the flue pipe
Step 16: Enhancing the Heat Capacity of a Homemade Potbelly Pot
The pipes themselves can be of different diameters, but the one with the smaller diameter is connected directly to the furnace. And on how to make a chimney for a stove yourself, read on.
Creating a stove gas stove from a gas cylinder
Another version of the design of the kiln for testing is a self-made potbelly stove based on a 50-liter gas cylinder. In addition to this basic element, it is necessary to prepare 2 steel pipes with a wall of about 4 mm and a diameter of 10 cm. One of them will remove burning gases, and the second will act as a heat exchanger.
To this should be added a 4 mm steel sheet for the visor above the heat exchanger and the partition separating the evaporator and the combustion chamber. For the evaporation chamber itself, you need a brake disc from a car with such a diameter that it effortlessly enters the cylinder. A piece of 0.5-inch pipe is needed to transport oil to the combustion chamber.

From a used cylinder, an excellent potbelly stove is obtained. Although there is no gas in it, it is better to play it safe - hold the bottle for some time on the street with an open valve. Soap foam is applied around the outlet. When it stops bubbling, the valve is twisted, if it is removable, if not, the condensate is drained in another way
In addition, you should have in stock an equilateral steel corner with a shelf of 50 mm and a length of more than 1 m, a 0.5-inch valve, clamps for sealing - 2 pcs., A hose, any cylinder equipped with a needle valve.
Work on the creation of potbelly stoves is carried out in a specific order. First, the cylinder is turned upside down and a small hole is drilled in it. A measure such as wetting the drill bit and the drilling site with oil will protect against sparking.

The valve is dismantled using a gas or adjustable wrench. After releasing the vessel from all residues, it can be cut, weld
Free the tank from gas condensate. Carefully merge it away from the housing, because its unpleasant odor persists for a long time. Then the preform is filled with water, after which it is again drained, thus removing the remaining gas. Since the mixture is explosive, there should not be an open flame source nearby.
Cut out in the container body 2 rectangles of the same width equal to 1/3 of the diameter of the workpiece. The height of the lower rectangle is 20 cm, the second one located 5 cm higher than the first, 40 cm. To separate the chambers, a circle with a diameter equal to the inner diameter of the vessel is cut out of the sheet.
In its middle, make a hole for a pipe with a diameter of 10 cm. This part will separate the combustion chamber from the heat exchanger.
A burner is made from a pipe with a length of 20 and a diameter of 10 cm. Its lower part is perforated by making holes about 2 cm in diameter. They clean the inside of the burrs, otherwise they will collect soot on themselves, which will significantly narrow the hole later.
The previously cut circle is put on the burner, positioning it exactly in the middle, welded. The design is placed inside the stove and a weld is made around the circumference of the cylinder.
The bottom and cover are welded onto the brake disc. It will be a pan or evaporator bowl. To supply fuel in the lid leave an opening through which air will flow into the potbelly stove. The opening is made quite wide, otherwise the draft will decrease, and the oil will not fall into the bowl.
Weld the pipe to the top of the lid. A sleeve is made from a pipe with a diameter of 10 cm, which will connect the bowl to the burner.
Assemble the fuel supply system, for which:
- make a receiving hole in the pallet;
- insert into it at an angle of about 40 ° a piece of a water pipe of 0.5 inches;
- weld the pipe to the furnace body;
- an emergency backup valve is screwed to the pipe, the role of which is played by an ordinary water tap.
A heat exchanger is made of a pipe with a cross-section of 10 cm. It is cut horizontally into the potbelly stove case, and a reflector is mounted at the end. Arrange blowing by installing a duct fan at the end of the heat exchanger. Air driven through the heat exchanger with its help has a high speed.

In order to make the system more manageable, it is automated by connecting a thermal relay to a duct fan. This solution allows you to set the desired temperature.
An air swirl consisting of triangular teeth connected by welding is placed inside the heat exchanger. A chimney is made from a pipe with a cross section of 10 cm.
It is welded into the hole located in the upper part of the furnace body and led out through the wall to the roof of the building.

The pipe section passing through the enclosing structure is best placed in a refractory cup, and a metal sheet should be attached at the entrance
Next, they make the oil tank. If there is a freon-free cylinder with a working needle valve, then it is quite suitable for this purpose. The vessel and the potbelly stove are connected by a hose connected to the valve. A hole is made in the tank body to fill the used oil.
To ensure air access to the burner and the evaporator bowl, a groove is selected in the lower compartment door. Thrust plates are attached to the opening of the upper chamber door, which ensures reliable sealing of the combustion chamber. For the same purpose, the door is additionally equipped with a lock.
Now, even if the stove case is deformed as a result of strong heating, the tightness of the combustion chamber will not be violated.
It remains to weld the legs from the corners to the body and put the oven upright. In addition to bourgeois in a vertical version, horizontally arranged stoves are also made from a cylinder. Their device is similar.
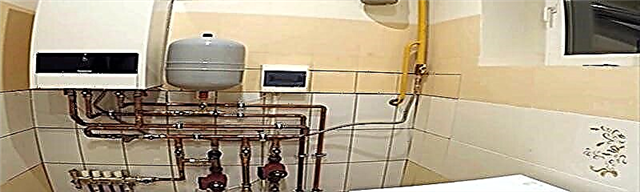
Potbelly stove plus water circuit
An emergency heat source will not hinder any home. An ordinary, but slightly modernized, potbelly stove may play its role. There are two ways to improve the furnace: put a water jacket on the burner tube or wrap its body with a coil of copper tubes.
The coils of the coil are placed at a distance of about 5 cm from the perforated body of the potbelly stove and connected to a common heating system. Around the coil install a reflective screen. For its manufacture, sheet aluminum, galvanized steel, and tin are used.
A water shirt is a tank on the upper chamber of a potbelly stove. There should be 2 fittings in its body - one for supply and one for water drainage. In general, the design resembles a samovar. The volume of the water jacket depends on the length of the heating system and the method of circulation of the coolant.

In practice, the device of the water circuit is solved by installing a tank directly on the potbelly stove. Through the outlet to the heating system, hot water enters the latter. After walking in a circle, she pours heat to the room and returns to the tank
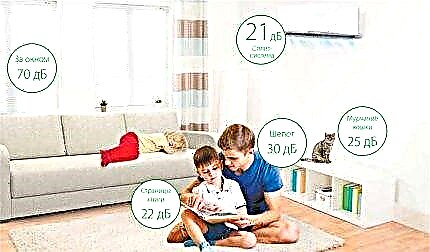
If a pump is mounted in the system, the volume of the tank is small, and with natural circulation it has impressive dimensions. To control the parameters of water, a pressure gauge and a thermometer are installed on the tank.
Drip potbelly stove in mining
You can also make an economical model of a drip potbelly stove yourself. For the case, a metal barrel of a small volume or another tank available on the farm is suitable. A hole is made in the housing through which oil will flow.
Next, take a burner with a capacity of about 2 l, connect a copper pipe 1 m long to its hose, and then fold it in half.

Such a unit operating on spent petroleum products can smoke, so the room in which it is installed must have good ventilation
A hole is made in the container along the diameter of the tube. The tube itself is shaped like the letter “G”, and the burner is suspended.
Alteration of solid fuel potbelly stove for mining
When there is already a potbelly stove in the household, but it is not satisfied that it works on solid fuel, it is possible to modernize it and it will become universal. For this, a prefix is made that resembles in its design a stove for processing in its lower part.
Here, too, there is a perforated pipe, but not a straight one, but bent at a right angle. It is connected to the side wall of the furnace, which serves as the final combustion chamber. If you weld the door of the potbelly stove and make a hole in it for the pipe to enter, the furnace will only work on working off.

The modernization of this furnace consists not only in supplementing it with a special prefix, but also in the original solution to protect nearby objects from fire, using the principle of convection. To do this, pipes were welded to the side wall of the furnace. The cold air entering them from below cools the structure
In order to be able to use not only technical oil, but also firewood for heating, two removable doors are made. The standard one is hung when it is planned to lay firewood, and the modernized one with the corresponding hole - when the stove will operate on used oil.
We also offer to read an article on how to collect a potbelly stove on waste oil from a pipe - to familiarize yourself with the material, follow the link.
The secrets of the successful operation of the stove
In order for the work of a waste oil stove working on waste oil to be effective and safe, you need to adhere to a few tips. The oil must be settled before use. Pour it into the oil tank for 2/3 of the volume of the latter.
For safety reasons, all elements of the potbelly stove should be cleaned regularly. To simplify this task, its upper module should be removable. This will provide access to the chamber where the mixture is combusted. To remove soot from the walls of the chimney, tap it.
To extend the life of the combustion chamber and the furnace as a whole, it must be painted using paints that are resistant to high temperatures. Install a potbelly stove on a non-combustible basis. You can not place it on a draft, under the influence of which the flame can escape.
The author of this material talks about his experience in manufacturing potbelly stoves working at mining. Perhaps some of his statements are controversial, but overall there are many useful things:
Improved stove design. The author of this video shares the details of its creation:
This author shares this invention of the video material:
The potbelly stove has a simple design, but to make it yourself, you need drawings with exact dimensions. The design, made on the "eye", not only does not provide heat, but also will become a source of various troubles in the form of soot, splashed oil and numerous alterations.
It makes sense to start manufacturing such a unit only when it is possible to provide it with fuel. Otherwise, its operation will be economically disadvantageous.
Perhaps you already have experience in the independent production of a stove-potbelly stove? Please share valuable advice with our readers. Leave comments in the block below. Here you can ask a question of interest to the topic of the article, and we will try to respond to it promptly.