An independent water supply system will forget about the main inconvenience of suburban life - the absence or lack of water. But to arrange a water supply in the country from the well is quite simple, especially since the water intake for one plot of land does not necessarily have a large flow rate. After all, I would like to get water on my own site, right?
Having familiarized yourself with the information submitted for consideration, you can independently make an autonomous water supply system. It will reliably deliver water to convenient places for use. Those who wish to increase the level of country comfort with our help will easily cope with the arrangement of the system.
We described in detail the equipment required for assembly and installation, examined the principle of operation and purpose of each device. In our article, we describe in detail the technology of work with step-by-step detailing. Valuable information and recommendations are supplemented by photo collections, diagrams and video reviews.
Types of tubular water wells
A well is a circular development drilled without human access to the face. The diameter of such a mine is always much smaller than its depth. Two types of wells are used for water intake.
Filter or "sand wells"
The depth of such workings does not exceed 35 m. Filter wells are drilled on a closely lying aquifer, which is located in sandy soils.
Such a well is a casing assembled from pipes with a diameter of 127 to 133 mm. It is usually equipped with a screen filter of galunny weaving, but there may be other options. Filter wells have a small debit, most often it does not exceed one cubic meter of water per hour.

The construction of a well on sand is much simpler than the construction of a well on limestone. The depth of the sand excavation is less, it costs less, but it does not last as long as a well on limestone (click to enlarge image)
The advantage of such structures is the speed and relative cheapness of their drilling. Specialists will cope with the work in just a day or two. The main disadvantage is the tendency to siltation.
Therefore, it is very important to use such a well regularly; the life of the structure depends on it. Depending on the thickness of the aquifer and the intensity of use of the well, it can last up to 15 years, in some cases longer.
Image Gallery
Photo from
Hand Drilling
Small-sized drilling
Drilling with specialized equipment
Well pump with surface pump
Deep well pit
Concrete ring caisson
Well head with submersible pump
Artesian or "limestone wells"
Deep structures that are drilled to an aquifer common in fractured limestone. This is about 20-130 m in depth. Unlike wells on sand, artesian ones have a higher debit. It can reach up to 100 cubic meters of water per hour.
Drilling limestone wells is quite difficult, and the casing is long. The drilling procedure lasts four or more days.

The figure shows a diagram of an artesian well, which is characterized by a large debit of water and a long service life
Accordingly, the cost of work and materials is much higher. The advantage of artesian wells is their long life. They do not need a filter, because the host rock does not contain fine clay and sand particles.
Thus, siltation of the well does not occur, because it can last much longer than the filter, five dozen or even more years.
Choosing a pump for pumping water
The pump is a kind of "heart" of the system. The correct operation of the future water supply depends on the correctness of its selection. On sale you can find several types of pumps submersible and surface category.
Depth and surface aggregates
The latter are called so because the pump itself is removed from the pumped liquid. The unit body is located on land, and water is drawn through a hose lowered into the well.
Surface pumps can extract water from an average depth of 8 to 10 meters, which is why they are rarely used for wells. Most often, submersible devices are mounted to supply water. Their main difference from surface ones is complete immersion in water. Their design is specially designed for great depths, at which they are used as rationally as possible.
Submersible borehole pumps are divided into two types. A shaft is mounted in the housing of centrifugal devices, on which paddle wheels with blades are fixed.
When the shaft begins to rotate, the movement of the blades creates a centrifugal force that pumps fluid filling the interior of the device. Such pumps are reliable and versatile in use.

Surface pumps can operate at depths of not more than 8 -10 meters, therefore they are rarely used for well construction
In addition, centrifugal mechanisms are characterized by an optimal price / quality ratio. Vortex pumps are considered the most practical option. In addition to low cost, they are attracted by the extreme simplicity of design and unpretentiousness in operation and maintenance. The basis of the device is a membrane, on one side of which there is a liquid, on the other - a vibrator.
After switching on, the latter sets in motion and forces the membrane to deform, thereby creating a pressure difference. Which, in turn, starts the process of pumping fluid.
The mechanism is devoid of rotating elements and bearings, which are especially vulnerable and require constant monitoring and lubrication. The absence of rotating elements significantly reduces the heating of the device and extends its life.
For artesian wells, a high-performance submersible pump will be the best choice. They are specifically designed to work at great depths where surface pumps, even those equipped with an ejector, cannot function.
Installing a downhole tool in a well is quite complicated, as well as removing it. Properly selected and installed quality device will work for decades.

For work at great depths, submersible pumps are used that sink into the fluid and function inside the well
A cheaper counterfeit with such a load is unlikely to cope and will require repair. However, it should be understood that in the case of a deep pump, the cost of only dismantling it can be quite comparable with the cost of the device. Therefore, you need to purchase only a quality device.
Image Gallery
Photo from
Equipment for country water supply
HDPE pipes in the water supply system
Water filters
Experts identify several criteria that must be taken into account when choosing a mechanism.
The total depth of production and the water level in it
Key characteristics when choosing a pump. The technical documentation must indicate the optimum depth for which the device is intended to work.
If this requirement is not observed, the device will work inefficiently and can quickly fail. In the passport of the well, its depth and water level must be indicated. They can only be compared with the characteristics of the pump.
If there is no such data, you can use a very simple way to measure the depth of the structure. Take a long dry rope, tie a weight to its end and lower it into the well. We lower the rope down until the weights touch the bottom. We remove the cable. We measure the dry part - this will be the distance from the top to the water level. The wet part is the height of the water column.
Approximate debit of a water source
This is the name of the mass of water that can be obtained from the well for a certain period of time. In the passport, drillers indicate this value, but if not, we carry out approximate calculations.
We completely pump out water from the well and measure the time for which we did it. Then we measure the time during which the well will be filled with water. We divide the second result into the first and get an approximate debit, which will be enough to choose a pump.
Estimated Water Requirement
Different pumps can supply water at a speed of 20 to 200 liters per minute. In order not to overpay for a more powerful model, it is important to correctly calculate your own need for water.
On average, it is believed that one person needs about 200 liters of water per day, so a family of three to four people needs a pump with a capacity of 30 to 50 liters per minute.
Some people prefer to take a device with a “margin” of power, which will inevitably affect its cost. If it is planned that the pump will work not only to serve domestic needs, but also for irrigation, an increase in its power should be calculated.
It will depend on the size of the site, but on average it should be enough about 2000 liters per day. Thus, it is necessary to increase the need for water by 40-50 l / min.

Pumps have different capacities, in order to choose the right model, it is important to correctly determine the daily need for water
The pressure necessary for the operation of the devices
The pressure certificate must be indicated in the pump passport. To calculate the necessary head, we add another 30 to the depth expressed in meters of our well. So we get the height of the water column.
The result obtained is increased by another 10% and we obtain the desired value. Comparing it with the pump data, we select the model. If there is no exact match, “move” in the direction of increase.

The diameter of the pump must exactly match the diameter of the drilled well, otherwise problems with the installation and operation of the device cannot be avoided
Borehole diameter
Another important value that determines the power of the pump. Like others, it can be taken in the passport of the well or measured independently. It should be borne in mind that the diameter of the well must be expressed in inches, where the inch is 2.54 cm.
The vast majority of pumps are designed to work in 4-inch wells. For 3-inch, most likely you will have to order a pump in the catalog.
Autonomous water supply equipment
In order to equip the water supply from the well, in addition to the pump, we will need other special equipment necessary for the normal functioning of the structure.
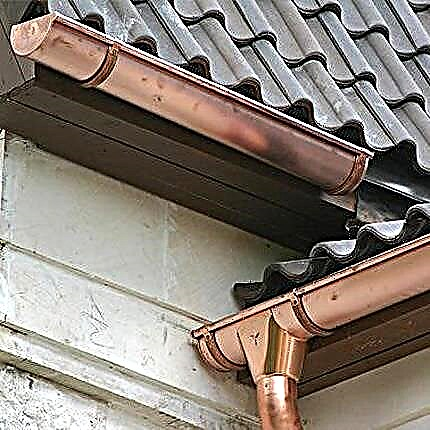
Sealed container to protect the head
An important structural element for arranging a well is a caisson. This is a sealed chamber in which the head of the well is located. It protects the structure from freezing in the cold season and from the penetration of groundwater.
In addition, all the equipment necessary for the operation of the well is located inside the tank. Therefore, the size of the caisson should be sufficient to fit inside the devices and a person who has come down for maintenance or repair.

The caisson reliably protects the well head from low temperatures and groundwater. Here you can place all the necessary equipment
The sealed chamber can be made of different materials: plastic, concrete, metal, brick or polymer sand. Each of the options has its own advantages and disadvantages.
The shape of the container can be any, but most often it has a round or quadrangular cross section. The caisson can be bought ready-made or made independently. In any case, the container should be equipped with a hatch with a tight-fitting lid.
The video will familiarize with the arrangement of the caisson for an autonomous water source:
Pressure accumulator for pressure generation
The device is a container separated by an elastic membrane. One of the resulting compartments is filled with air, the second with water. The water entering the tank stretches the membrane, thereby reducing the volume of the first compartment.
The more water, the higher the pressure in the first chamber. After the consumer opens the tap, the amount of water decreases and the pressure in the air compartment decreases.
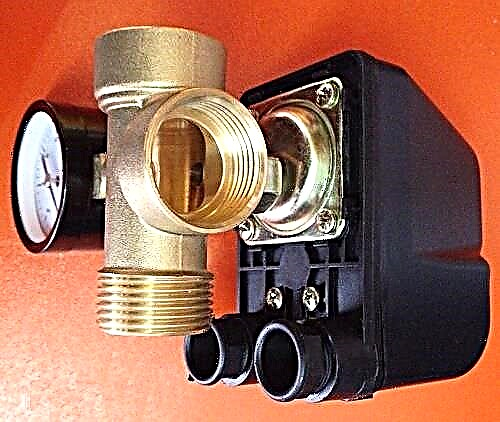
The hydraulic accumulator is supplemented by a sensor that monitors the pressure in the chambers. When it falls below a predetermined mark, the device gives a signal to turn on the pump and water from the well enters the system.
As soon as the pressure rises to a certain level, the pump switches off. The hydraulic accumulator is used to create sufficient pressure in the water supply for the operation of household appliances.
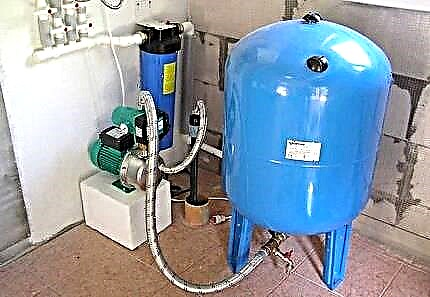
The hydraulic accumulator is necessary to protect the pump from premature wear, in addition, it creates the pressure necessary for the operation of household appliances in the system
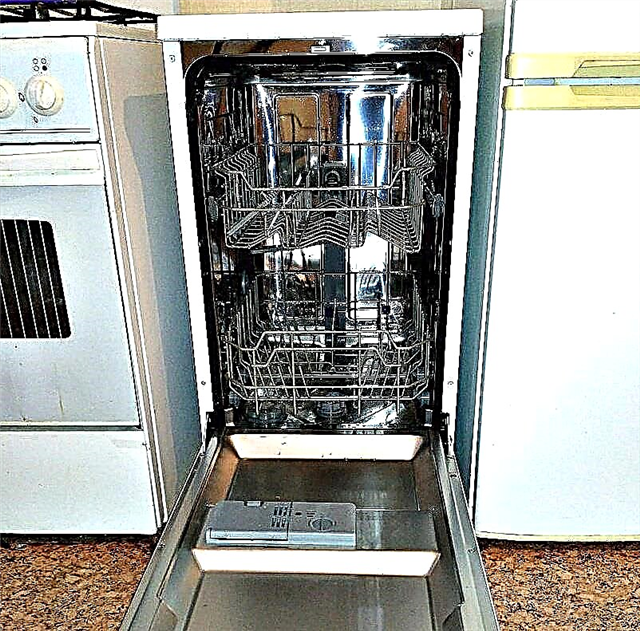
Some of them, for example, instantaneous water heaters, dishwashers and washing machines need a pressure of at least 0.5-0.7 atmospheres.
In addition, the device protects the pump from premature wear. Without a hydraulic accumulator, the equipment will turn on too often. And this is extremely undesirable for him, because turning on the pump more than 10 times per minute increases its wear by 40%.
Filter system for water treatment
Filters are required for wells of any type. Even deep artesian “give out” water with a high content of iron, heavy metals and other unhealthy trace elements. Therefore, the purification of such water is necessary.
You can choose the right type of filter only after analyzing the water. A complete cleaning system in the maximum configuration will look like this:
- Coarse screen. It is placed in front of the pump and in front of the accumulator.
- Mechanical filter. The device delays inclusions of 80-100 microns in size. Represents a flask with a replaceable fibrous filler.
- Aeration unit. Saturates with oxygen the water passing through it.
- Set of special filters. Each of them eliminates the excess of a certain element: iron, potassium, sodium, salts, etc.
- Biological Protection Unit. It is a carbon filter or an ultraviolet emitter that removes microorganisms from water.
- Fine filter. It stops inclusions up to 5 microns in size, which completely eliminates the liquid from precipitation and impurities.
As an addition, a reverse osmosis filter can be installed, which allows you to get drinking water of the highest quality.

The figure schematically shows one of the options for constructing a water pipe from a well (click to enlarge the scheme)
Water system construction technology
After all the necessary equipment is purchased and the well is drilled, you can begin to equip the water supply.
Stage # 1: laying pipes from home to the well
We determine the area on which the pipeline will be located, and proceed to digging the trench. Its depth should be greater than the level of soil freezing in this area by 20 - 30 cm. This is a very important requirement. Its non-performance threatens to freeze and destroy the system in the cold season.
At the bottom of the dug trench we lay a sand cushion, on it a 32-mm water pipe made of cross-linked polyethylene or metal plastic.
Alternatively, it is possible to lay a PDN pipe, but it collapses during freezing, which cannot be excluded.Some “specialists” instead of the pipeline lay in a trench a hose for water supply.
If you do not want to get problems with the operation of the water supply system, you should not do this. We pay special attention to the area of raising the pipeline to the house. Be sure to warm the foundation and wrap the pipe with a special material.
You can use a self-regulating heating cable for insulation, which is laid along the pipe at the lifting site. The same method is also used when for some reason it is impossible to carry out land work on the site.
Then they dig a shallow trench under the pipes and lay them together with a heating cable. The elements are wrapped with insulating material and placed in a pipe of a larger diameter.

The trench for water pipes should pass below the level of freezing of the soil. otherwise the system will be damaged in the cold
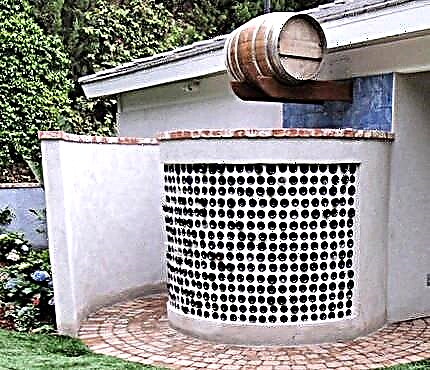
In addition, a storage tank for irrigation can also be added to the resulting system. Since warm water has a beneficial effect on plants.
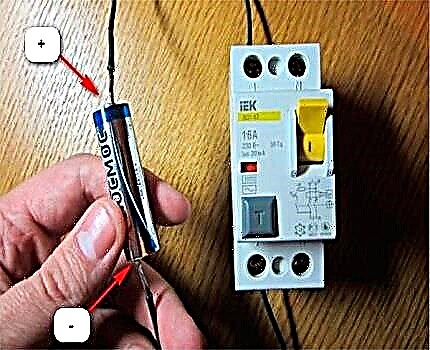
When laying the water pipe, do not forget to lay the cable that supplies electricity to the pump. It should be four-core and have a cross section of at least 2.5. The ROM box is placed in a designated place in a heated room.
Stage # 2: installation rules for the caisson
The installation of the box depends on what material the container is made of. The easiest way to install plastic and polymer sand tanks. In any case, first we prepare the foundation pit, which should be larger than the camera itself.
In some cases, we mount a concrete platform at the bottom of the pit. Then set the caisson in place and level it. In the case of a plastic container, we also fix it.
Home-made concrete chambers are assembled from rings or poured into a formwork assembled on site. Brick tanks are laid out right in the pit. At the end of the work, we install water pipes and a cable into the caisson; we securely seal the input sections. We lower and install the equipment for the well in place. If necessary, we backfill the installed caisson.

We lower the pump into the well very carefully and carefully. Every meter and a half, we fix to the water pipe an electric cable supplying the pump
Stage # 3: installation and connection of the pump
Before starting the installation of the mechanism, you must definitely familiarize yourself with the manufacturer's recommendations. We start by cleaning the well. We pump water out of it until the sand and other particles of pollution stop coming out.
To fix the pump in the well, we use a 4 mm steel cable of the required length or a 5 mm nylon cord. Securely mount it on the case. In addition, we connect the pump to the water pipe.
All operations are performed very carefully so that subsequently there is no jamming of the pump in the casing. For the system to function properly, a check valve is required for the pump, which will not allow water from the pipeline to return to the well.
Some models are already equipped with such a device, if not, install the unit. We put the bottom of the head with a sealant on the borehole pipe.
Image Gallery
Photo from
Step 1: Preparing the Depth Pump for Installation
Step 2: Connecting the Water Pipe
Step 3: immersion of the pump in the wellbore
Step 4: Development of a country well
Now you can gently lower the pump into the well. We do this carefully, without jerking, and do not forget to fasten the electric cable supplying the pump to the water pipe every meter and a half.
The wire should lie freely, without tension. After the pump touches the bottom, raise it to a height of one to three meters and fix it. Now we put in place the upper part of the head.
We connect to the water supply and electric cable all the equipment located in the caisson: a water purification system, shutoff valves, automation, etc.In the course of work, we accurately comply with all the recommendations of the instrument manufacturer. After connecting, we again check the reliability and tightness of the connections of the water supply pipe and the electrical safety of the newly assembled system.

The casing head is designed to seal the structure and protect it from dirt, debris, and foreign objects
Stage # 4: installing and connecting the accumulator
The volume of the accumulator can be very different: from 10 to 200 liters. Depending on it, the place where the equipment will be installed is selected. It can be either a caisson or a basement at home.
When choosing the installation site, it is necessary to take into account that it is necessary to provide free access to the device for subsequent maintenance, repair, or the possible replacement of a failed tank.
During the installation of the accumulator, a check valve must be installed to prevent the flow of water from the water system into the tank. It is placed in the direction of the fluid. Mounted and drainage valve, designed for emergency discharge of water from the tank. To reduce the vibration level from a working device, we mount it using a special rubber sealant.

Filters are an indispensable element in the arrangement of a water supply system. They make water from the well suitable for domestic use and drinking.
We connect a water supply pipe to the accumulator. We are assembling a starter that will power the pumping equipment with electricity. We connect a sensor to the accumulator, which will exercise control over the pressure in the capacity compartments, and through it we energize the starter. We connect the accumulator to the internal water supply system, directly or through a collector.
Stage # 5: performing a test run of the system
After the installation and connection of all elements of the system have been carried out, you can proceed to its trial run. First, activate the pump and, if necessary, debug its operation.
Then we fill the storage tank with water and check the accuracy of the automatic start-up and shutdown systems of the pump. Then carefully inspect the entire pipeline.
We need to identify possible leaky areas. If there are any, we carry out repair work. In addition, we check the operation of all plumbing fixtures connected to the water supply.
We also pay attention to the system performance: the water pressure should be normal even with all cranes open. If the test run was successful and the system works without failures, we dig in a trench supplying water from the well to the house.
To independently assemble the water supply from the well is a rather complicated task. It is important to choose the right equipment that matches the type of well, correctly install it and connect it.
In the absence of experience in such work, it is worth entrusting them to specialists who will quickly and correctly equip the system. The owner will only have to enjoy the comfort of his home, equipped with an autonomous water supply system.
We are waiting for your stories about the hand-made device of the water supply at the summer cottage. You can leave them or comments in the block below. Comment, please ask questions, share information and knowledge.